Wednesday, 25 May 2016

Wedding Card

Well it never ceases to amaze me how many people pop in to look at my blog on a day to day basis, and just how worldwide they are.  I have people who have dropped in from America, Portugal, Russia, Mexico, South Africa, Romania, Ukraine, France, Ireland, and of course the UK.  I would like to thank each and every on of you for popping in and it is always lovely to receive comments on my cards.

At the beginning of the week I was asked by a friend to make a last minute wedding card, which was a challenge as I didn't have any specific wedding dies or stamps, so had to make the most of what I had!  I hope she likes it, as I am always nervous when making things for people as you never know exactly what they are going to like.

As you know I like the clean and simple look so stayed true to this!  I started by cutting my matts and layers, including the die cut elements before putting them together, with two layers of foam tape added to give a bit more dimension.


I stamped the sentiment and then added the Sue Wilson Delicate Daisies complete petals and just layered these up to create this effect and finally I used the Creative Expressions white pearl corners which I think just finishes it off nicely.


The recipe for this card is as follows:

Foundations Cardstock - Coconut white & Iris
Sue Wilson Pierced Squares
Phil Martin Scribbled Sentiments stamp set
Sue Wilson Heraldic Square
Sue Wilson Herald Square
Sue Wilson Delicate Daisies Open Petals
Creative Expressions Corner Pearls
An assortment of small pearls from my own stash

I hope you have enjoyed this card and look forward to catching up again soon.

Until then, take care

love

Ginny xx


Monday, 16 May 2016

Pixie Powders

I'm afraid it has been a while since I have updated my blog.  The problem is there has been so much going on that I have gotten a bit bogged down.  I now have 9 lambs to bottle feed and a friend has been poorly so I have been looking after her horse too, as well as work getting in the way.

I am pleased however that I have managed to get some time to take part in some craft classes and a couple of weeks ago I was lucky enough to take part in a workshop with John Lockwood.

I had a great time playing with the new Cosmic Shimmer Pixie Powders and the Sue Wilson dies, which are a real favourite with me.

Anyway, this is the card I produced and I love the colours and the look can be changed so easily by changing the sentiment and colour!


A bit of short and sweet from me, but hope you like the card.

Take care, until next time

Ginny xx

Sunday, 10 April 2016

Same Die Different Look!

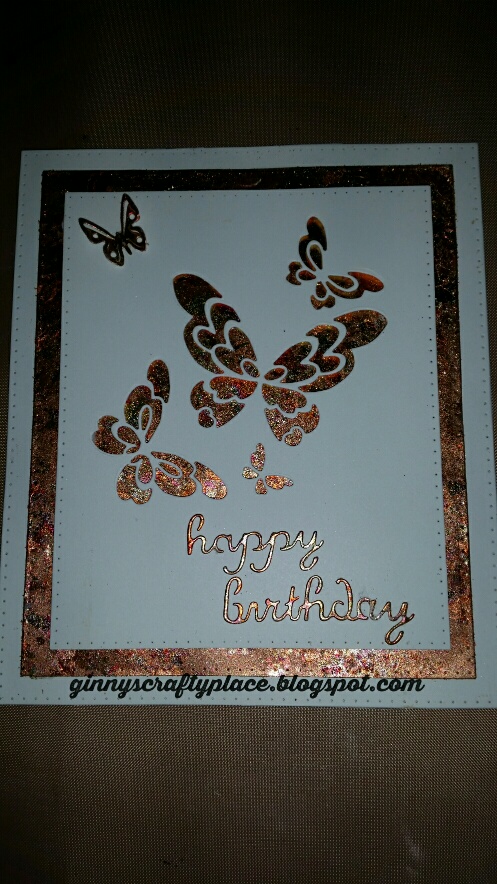
I really enjoyed working with the Poppystamps Bellina Butterfly Collage last time so decided to play with it again, only this time I used gilding flakes.


Its amazing that by using the same die you can have two totally different looks,  I hope you agree that even though this card is slightly simpler it is very effective.

What do you think?

Well that's all for now but will catch up again soon!

love

Ginny x

Friday, 8 April 2016

Butterflies & Flowers

For todays post I have used a combination of Honey Doo stamps, vellum and a Poppystamps die.

A few weeks ago I have a play with the Honey Doo Little Lillies and Leaves stamp set. I stamped these with Perfect Medium onto clear vellum, and then applied sparkling white embossing powder and heat embossed it.  Once this had cooled I then applied chalk inks to the back of the velum.  I then cut them out by hand and shaped them.

 
I used a variety of pastel colours and they were surprisingly sparkly!
 
I then used the same colour inks to a piece of card which were applied with the Inkylicious ink dusters (my new favourite crafting item!).
 
I then used the Bellina Butterfly Collage die by Poppystamps to cut into white card, which I then layered up with the coloured card, arranged the flowers and finished off with just a few pearls. This was then matted and layered up to finish it off.
 
I have to say I was really chuffed with the final result, what do you think?
 
 
You can really see the sparkle in this card ;-)
 
The recipe for this card is as follows:
 
Foundations cardstock: coconut white and pink
Clear vellum
Honey Doo Little Lillies and Leaves stamp set
Bellina Butterfly Collage die by Poppystamps
Sparkly white embossing powder
Brilliance ink pads in pastels
Inkylicious ink dusters
Pearls from my stash
Sue Wilson Pierced Squares
Perfect Medium
 
I hope you enjoy this card and would love to hear your comments.
 
Until next time
 
Ginny x

Tuesday, 29 March 2016

Meet Walter!

Well I promised something a little different for my next blog post, and here he is!  In my 'spare' time I bottle feed orphan lambs!

Meet Walter!


(Please excuse the colour of my husband - I promise he is not really this yellow, I think it was the lighting!)
 
Walter is an orphan lamb that I will be taking on shortly.  I have 2 horses and I keep them on a working farm and they are in full blown lambing, which is always amazing!  For the last two years I have cared for the orphan lambs, bottle feeding them until they are ready for the big wide world.  It is hard work but very rewarding.  At the moment there are 3 orphans for me to care for which should be a doddle compared to the 13 I had last year, but having said that lambing is not yet over so this could all change!

Well that's all for now. 

love

Ginny xx

Monday, 28 March 2016

Retro Roses

Well I hope everyone has had a lovely Easter.  I have had a very quiet few days and also been looking after a friends horse, so that has kept me out of trouble!
 
I have a weeks holiday this week so am hoping to get some crafting done, so watch this space!
 
This week I am sharing yet another card I have done with Julia Watts, and I think this is one of my favourites ............. I am always saying that aren't I!
 
Anyhow for this card we did some colouring using the Tim Holtz distress markers applied with a watercolour brush,  which I really like.  I enjoyed the colouring far more than I thought I would and it was great to use the Stamps to Die For Retro Roses which fits the Sydney die.  The background die is also one of the new Spellbinders card creator dies.
 

The recipe for this card is as follows:

Foundations cardstock - coconut white and milk
Spellbinders Card Creator Deco Lux
Sue Wilson Dies - Delicate Fronds, Orange Blossom Closed Petals, Sydney Die
Retro Lavish Sentiments stamps
Stamps to Die For - Retro Roses
Archival black ink
Cosmic Shimmer Glitter Jewels
Watercolour pens
Tim Holtz Distress Markers - broken china, evergreen bough, shaded lilac and cracked pistachio

I hope you have enjoyed this card, and will hopefully have something a little different to share with you next time!

Until then

love

Ginny x

Friday, 18 March 2016

All White!

Well another card from last weekend - I love this one!  I always think the white on white cards look so stylish.

This card actually took quite a lot of work, as there were lots of elements to it.


Firstly, I cut the Sue Wilson Classic Weaving die and did the weaving that is at the back of the card - I love this detail and was the first time I had used this die.  Next I cut the Ornate Pierced Squares and layered elements of this die up, followed by the New Zealand Hamilton die.  Finally we cut the Orange Blossom complete and open petals and arranged them with the Laurel Leaves.
Finally I heat embossed the sentiment from the Petite Lavish Sentiments in silver. To finish it off I placed white 8mm white pearls on the flowers and in the corners of the card.
 
I hope you like this card as much as I enjoyed doing it!  White on white is definitely one of my favourites ;-)
 
Well that's all for now but thank you for stopping by to share my creations.
 
 
Take care
 
Ginny x